
Download this Printable File on Thingiverse: https://www.thingiverse.com/thing:4300018

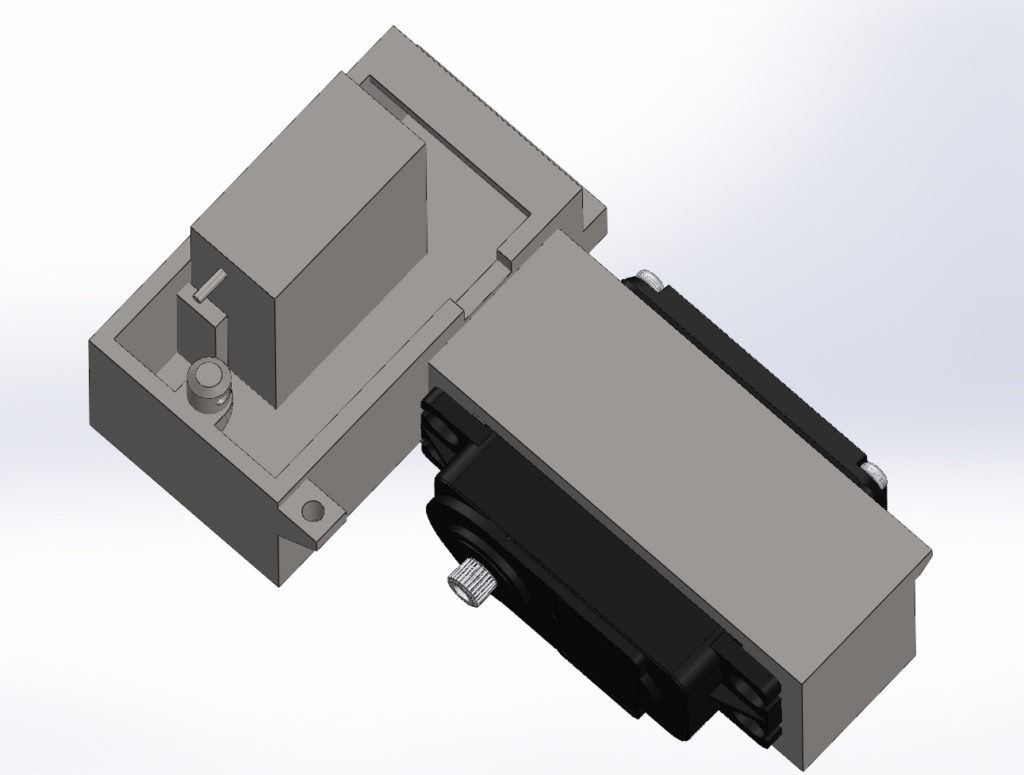
The trigger for me to design and print this radio box came from a requirement that the physical internal size of the stock box was too small. I could not get the radio that I wanted to use in the stock box. What was required was a new box that maximized the available room inside. But the problem was the physical footprint where the radio box is installed on to the buggy was rather limiting. Also, this box must have an easier method of accessing the radio inside. Here we make use of a standard body clip to lock the cap in place. You can see this in the image above.
Just for reference RX refers to the receiver.
The stock radio box also includes the steering servo mount. The steering servo mount has been designed in such a way to maintain high strength as a number one priority.
There are 2 Printable Versions
One version has side flanges in side the box for a receiver. The internal distance between these flanges is 26.5mm. The other version of the box does not contain any flanges for installation of a more generic radio receiver. You may see these when you load the files in to your printing software.
The internal opening size of the box is 32.1mm long x 24.8mm wide x 40.8mm Deep. These dimension include the space that would be occupied in the cap.

3D Printer Settings
Printer brand: MakerBot
Printer: MakerBot Replicator (5th Generation)
Rafts: Yes
Supports: Yes
Resolution: 0.2mm
Infill: 35% (Recommended)
Filament Brand: MakerBot
Filament Color: White
Filament Material: PLA
Shells: Use a Minimum of 2 shells
Post Printing
The Radio Box must be Tapped for M3 Fasteners. Once the Radio Box is completed, your 3D printed may have shrunk the size of the holes required to be tapped. If this is true be certain to drill the hole back out to be suitable for a M3 tap. Once the hole is at the correct size tap the 4 holes for an M3 fastener.
Upon Installation of your RX box, there are two wire exits that you can use for the ESC. One is located at the bottom corner of the radio box. The other is located right under the cap. Choose which location you would prefer to use. As for the steering servo, use the wire entrance slot at the bottom of the box to pass the connector through.
Use a body clip to secure and lock the cap of the box in place. This allows quick and easy access.
Hiding Wire
The box has a convenient area where excess wire can be tucked away. This is located right under the lip where the cap locks in to place on the side where the steering servo wire exits the box. Use this area to hide excess wire.
Other Considerations:
The box is not waterproof and is never intended to be. Place your receiver in a balloon if you operate in wet condition.
Check Out more 3D Printed Projects